Thursday 17 September 2015

Roast potatoes slices

The idea of making potatoes in the oven that come out all crispy on the outside and soft on the inside is probably something that most of us associate to our mums or grannies and probably with Sunday lunches.
Here is an alternative which is simple to make (a bit time-consuming) but looks really cool.
Peel a few potatoes (this will depend on the size of your oven dish) and then slice the potatoes as thinly as you can, always keeping the slices in order, thereby keeping the original potato shape. Now peel an onion and do the same thing. In a cup, melt a knob of butter in the microwave and add about two tablespoons of olive oil to it. Spread a little of this mixture to your oven-proof dish and then arrange your potatoes in the dish (standing up), adding some of the onion slices in between the potatoes. Fit as many potatoes into the dish as possible.
Next, add salt and black pepper to taste and finally, using the remaining oil and butter mix, baste the potatoes.
Bake in the oven for an hour and ten minutes. Remove and add a sprig of thyme or rosemary and return to the oven (grill if possible) so that everything browns and toasts and becomes nice and crispy. Serve with meat or chicken as an alternative to normal roast potatoes.


Saturday 1 August 2015

My daughter is an absolute fanatic for all sorts of cold meats (fiambres) and that fact has inspired me to look for a recipe that fits into the Simple Foodies philosophy of making wow things in a simple way. And I must confess that I was surprised to learn just how simple it is to make these stunning cold meats. Time consuming to be fair. But simple also ...
I've decided to make a cured pork on my first attempt. The meat cut is called pork loin (carre de cerdo) and it's a thick piece of meat devoid of too much fat and no bone.
In a Tupperware container, place a 2cm layer of course salt. Place the meat on top of this salt and then proceed to cover the meat with course salt, until you cannot actually see the meat any longer. Place the lid on the plastic container and leave in the fridge for anywhere between 12 to 18 hours (the longer you leave it the saltier the final product will be).
Once removed from the salt, rinse and pat dry with a paper towel. In a mortar and pestle, crush three cloves of garlic, add 1 to 2 tablespoons of oregano and two tablespoons of sweet paprika (spicier herbs will flavour your meat differently). Now add olive oil until you have a smooth paste.
Place the meat on a big piece of plastic film and, using your hand, cover the meat with all the paste. The next part isn't necessary but it can be included just to make the finished product look good: use butcher's twine or normal kitchen string, and tie the meat up in concentric circles. Once you've achieved this, wrap the meat up in the plastic wrap as tightly as you can. Add a second and a third layer of plastic if you like. Place this meat in the fridge for anywhere between 48 and 72 hours.
Remove from the fridge, remove the plastic and then hang the meat in a cold, dry place. For hygienic reasons, I hang the meat inside a muslin bag (to keep the bugs away). The meat should hang out until it reaches the texture you desire (to be determined by squeezing the meat with your hand - softer is moist and firmer is dryer - everyone will have their own preference).
Then simply cut the strings away and slice your bondiola as thinly as you can and enjoy.
Follow me on Instagram: johncavernelis
Check out my Facebook page: Simple Foodies

Sunday 19 July 2015

Banana loaf

This is one of those quick recipes that can get you out of a bind when you need to make something "wow" but you don't have the time or you're not in the mood for too much effort.
Take 2 to 3 very ripe (over ripe even better) bananas and mash them in a mixing bowl, using a fork. Next, add in a third of a cup of melted butter and mix through. Now add a teaspoon of baking soda, a pinch of salt, a teaspoon of vanilla extract, a beaten egg as well as a cup of sugar (reduce this if you want the cake to be less sweet). and mix through. You will now have a very runny mixture, to which you will need to add one and a half cups of flour, to give you a thick yet runny batter.
Pour the batter into a bread baking mold and bake in a pre-heated oven at 175°C for about an hour or until a toothpick stuck into the cake comes out clean.
You could easily add in crushed nuts to give the cake an alternate texture and once cooled, pour an icing sugar topping over the cake and allow to set before serving. Enjoy!
Follow me on Instagram: johncavernelis
Check out my Facebook page: Simple Foodies

Saturday 18 July 2015

Samoosas

When I was a child growing up in South Africa, every birthday party or other social gathering seemed to have these savory delights present. As I got older they became a popular snack while out and about, bought from any of the Muslim fast-food places in my neighbourhood.
In effect, a samoosa is a pie filled with spicy minced meat and onions, although the Indian versions are often vegetarian.
If you are lucky to live in a country where samoosas are popular, all of the processes below will seem a waste of time, as you will simply pop down to the supermarket where you can buy them frozen. For those of us who are not so lucky, here is a very simple way to make samoosas.
First of all, make the dough: take 270g of flour, salt and add 180ml of room temperature water. I like to add half a teaspoon of tumeric, just to give my dough some colour and flavour. Once your dough has been made, divide it into three equal parts and roll each one out as thin as you can. Next, baste each layer with oil and layer the next layer on top. Once all three layers are arranged, cut into strips about 8-9cm wide (narrower will produce smaller samoosas).
Arrange these strips on a baking tray and bake for a few minutes and remove from the oven, separating the leaves one from the other.
The filling: take a large onion and dice finely, add crushed chilis, curry powder, garlic and ginger paste and fry until the onions are soft. Now add minced meat (optional: add peas or cooked potatoes).
Once the filling has been cooked and has cooled, place a little on the one end of each strip and then fold diagonally one way and then diagonally the other way, making a triangle. Repeat this process for the length of the covering. The end piece will then be tucked under one of the folds, thereby sealing the samoosa.
Fry in hot oil until brown and crispy. Allow to drain on kitchen paper and enjoy.
Follow me on Instagram: johncavernelis
Check out my Facebook page: Simple Foodies

Monday 13 July 2015

Dips

I recently prepared a farewell brunch for a good friend and was totally undecided as to what I should make. So I decided to make a variety of dips, accompanied by easy-to-make flat bread. The total prep time was less than half an hour and the final product was amazing. Here are a few of the dip recipes:
Hummus: this is rapidly becoming a favourite both among my family as well as my friends and colleagues. Take a tin of cooked chickpeas and drain the liquid. Add the juice of half a lemon as well as a clove of garlic. Add two to three tablespoons of olive oil to start with and then blend with a hand-held blender. Keep adding olive oil until your hummus reaches the consistency you desire.
Tuna dip: drain the water from a can of shredded tuna and empty contents into a bowl. Dice half an onion as well as a quarter red and a quarter green pepper. Add paprika and black pepper as well as a big dollop of mayonnaise. Stir with a fork, adding more mayonnaise until you reach the consistency you desire.
Pea dip: drain the liquid from a can of peas and pour contents into a bowl. Add a tablespoon of lemon juice, salt and pepper to taste, three tablespoons of grated Parmesan cheese, 100g of cream cheese and a dollop of chopped parsley. Blend everything together and add some parsley for garnish.
Follow me on Instagram: johncavernelis
Check out my Facebook page: Simple Foodies

Butter cookies

There are few things that I would rather be doing on the first day of the school winter holidays than making cookies with my daughter. The camaraderie in the kitchen, the small talk, the planning and then the actual baking. Coupled to the fact that the kitchen has that homely smell of cookies baking. All in all a great experience. And the recipe is the simplest one of all:
Take 250g of soft (room temperature) butter and mix it with 150g of caster sugar until well blended. Now add the yolk of one large egg and beat until the mixture is smooth. Next add 300g of flour and a half a teaspoon of salt and mix until you have a dough ball. Wrap the ball in some plastic warp and leave to rest in the fridge for half an hour.
Once cooled, dust your work surface with flour and roll out to about half a centimeter and then cut with cookie cutters. I used two heart shapes (big and small). Bake until lightly brown. Allow to cool. Place some (red) jam, like strawberry in the middle of the solid heart (on the back side) and place the heart with the hole over it. Enjoy!
Follow me on Instagram: johncavernelis
Check out my Facebook page: Simple Foodies

Wednesday 8 July 2015

Carrot cake (muffins)

On one occasion, many years ago, when I first arrived in Argentina, I was invited to an asado on a farm in San Antonio de Areco. And, as is my custom, I baked a cake to take along. A carrot cake. Unknown to me at the time, carrot cakes were not that well known amongst my group of (new) friends and the amount of banter I had to put up with for making a "salad" cake was unreal. Thankfully, today, my friends are all in love with this simple and very tasty cake.
The cake is made in two separate bowls, one for the dry ingredients and the other for the wet ingredients. In the dry ingredients bowl: 2 cups of flour, 2 cups of sugar, 2 teaspoons of cinnamon, 2 teaspoons of baking powder, half a teaspoon of salt and half a teaspoon of ground nutmeg.
In the wet ingredients bowl, 4 eggs, half a cup of oil, 3 cups of grated carrots, half a cup of broken up walnuts.
Mix each bowl separately and then combine, mixing just enough to combine the ingredients. Pour the mixture into a loaf baking pan and bake for about 30 to 35 minutes on medium heat or until dry on the inside. Alternatively, as I did this time, bake in muffin tins.
Follow me on Instagram: johncavernelis
Check out my Facebook page: Simple Foodies

Tuesday 7 July 2015

Potato bake

This is a very simple dish to make that is also a sure winner on so many fronts: looks, taste, cost, ease.
Start off by boiling a few potatoes. I leave them whole and then cut them afterwards, in that way they don't break apart in the pot. If you'd prefer the more rustic version to this recipe, use small potatoes, leave the skins on and boil whole.
Once the potatoes are in the pot, cut up a large onion as well as a clove or garlic and fry these in a little butter until soft and transparent.
Next, cut up some salami (optional) and set aside. Also, grate some cheese for garnish.
And the final ingredients: in a bowl, beat two eggs, add salt, black pepper to taste, as well as some cream.
Now to pull it all together: cut the cooked potatoes into thick slices and arrange in an oven-proof dish. After the first layer, sprinkle some of the salami as well as some of the braised onions. Repeat this layering process until all the ingredients have been used up. Now pour the egg mixture on top and finally, cover with cheese. Bake in the oven for about ten minutes (keeping in mind that almost everything is already cooked) and finally place under the grill to brown the cheese. Enjoy.
Follow me on Instagram.
Check out my Facebook page: Simple Foodies

Saturday 27 June 2015

Cheesy French baguettes

Whenever I make bread, the shape is either that of a loaf or a "free form" which basically translates to "I have no control over the shape". So I took a piece of aluminium drain pipe (8cm diameter), cut it in half and folded it over so that I have two perfect moulds into which I could bake French-style baguettes.
The actual bread recipe is simple enough: flour (as much as you need), salt and about a tablespoon of olive oil. I added grated cheese as an alternative. To this, add yeast that has proved in a bowl with warm water and two teaspoons of sugar. Mix everything together ans slowly add more warm water until you get a soft dough. Knead until smooth, place in a bowl, cover and leave in a warm, dark place until the dough doubles in size.
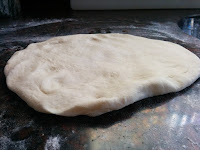
Remove from bowl, punch out the air and cut into two equal pieces. Roll out into a disc (about the same size as your mould is long) and then roll it up into a cigar-shape. Place his into your mould and allow to prove again.
Bake in a hot oven and should you desire the bread to be hard and crispy on the outside, use a spray bottle with water, every few minutes.
Follow me on Instagram: johncavernelis
Check out my Facebook page: Simple Foodies


Friday 26 June 2015

Tortilla

This is a very yummy and versatile Spanish dish that can be eaten warm or cold, with or without all the extra trimmings.
What it is, in effect, is deep fried potato chips that is cooled and then combined with eggs to make a kind of omelette.
Peel potatoes and cut into small cubes. Deep fry until crispy. Remove from the oil and allow to drain and cool.
Meanwhile, take eggs (I used 5) and beat in a jug. To this I added the following: one small onion, finely diced, chopped parsley, salt, pepper, paprika and a teaspoon of baking powder. Other alternatives could be diced chorizo colorado (typical in the Spanish version) or diced ham. Really, the extras will personalise this recipe for you.
Now mix the egg mixture with the potato chips and turn out into a non-stick pan, moving around with a spatula. After a little while, the bottom of the tortilla will be "cooked" with the middle and top will be raw. Now for the tricky bit: place a plate on top of the tortilla and, holding the plate and the pan with a cloth, turn everything over. The partially cooked tortilla will now (hopefully) be in the plate. Return the pan to the heat and simply slide the tortilla back into the pan, so that the raw side is now on the bottom. Cook for a little while longer until it reaches the consistency that you desire.
In Argentina, tortilla is done in one of three ways: completely cooked, slightly moist or undercooked. A very good friend, on honeymoon in Spain, decided to ask for a tortilla undercooked or "babé" to which the waiter replied: "We have tortilla well-done or not well-done". So you choose the cooking consistency that you desire!
Follow me on Instagram: johncavernelis
Check out my Facebook page: Simple Foodies

Sunday 21 June 2015

Ciabatta

Of all the different bread types there are, ciabatta is by far my favourite. And yet I've never made any, until now, that is. By way of its ingredients, this is the simplest kind of bread, made simply with flour, yeast water and olive oil. The secret to getting it to look and feel like ciabatta has more to do with technique than anything else.
So, to start with, take three and a half cups of flour, a teaspoon of salt, a teaspoon of sugar and one and a half teaspoons of dry yeast and mix in a bowl. Now add a cup and a half of room temperature water and mix. You will have a very stick dough. Resist the urge to add more flour. Turn the dough out onto a floured surface and divide into two equal pieces. Place each piece in a bowl, cover with a cloth and leave to double in size (about an hour).
Flatten the dough out with your hand and then fold the one edge toward the middle, then the other edge, then each of the two ends. Turn over and repeat. Place this folded dough into the bowl, cover and leave for an hour. Repeat this process three times. On the third occasion, instead of returning it to the bowl, place on an oiled baking tray and allow to rise again. Bake in a medium oven until brown. During the baking process, use a water spray and moisten the bread every five minutes. This will ensure a lovely crispy exterior.
Follow me on Instagram: johncavernelis
Check out my Facebook page: Simple Foodies

Sunday 14 June 2015

Baking bread - cold rise method

Let's face it, there are few things that bring us more pleasure than the smell of freshly baked bread first thing in the morning. The only issue with that is that baking bread the conventional way could take up to two or three hours, depending on the time it takes the dough to prove. So here's a simple alternative.
Prepare your dough in the evening as you would normally, but half the amount of yeast you use. So that would be something like two to three cups of flour, a teaspoon of salt and a few tablespoons of olive oil. Mix half a packet of dry yeast in a little warm water with some sugar and add to the dry ingredients. Mix by hand until you have a soft and slightly sticky dough. Place the dough in a large bowl and cover with plastic wrap. Up till here, everything is much the same as before. Now, normally, you'd place the dough in a dark warm place to double in size for about an hour. Instead, place the bowl in the fridge and go to sleep!
The proving process will continue in the fridge, just much slower. Also, the yeast will have more time to flavour your bread. And if you're like me and you wake up at some stage in the small hours to go to the bathroom, remove the bowl from the fridge flatten it down, shape it on your baking tray and allow it to return to room temperature. Then go back to bed. By the time you wake up, your bread would have risen to the desired height and all that is left is to bake it and make a whole lot of people in your house very happy.
For this particular loaf I made this morning, I placed a tray in the bottom of the oven with water (to create steam) and every ten minutes or so I removed the bread and sprayed it with water, thereby ensuring a hard, crispy exterior. Yum!
Follow me on Instagram: johncavernelis
Check out my Facebook page: Simple Foodies

Tuesday 9 June 2015

Sausage rolls

These little delights are not at the top of my food choices simply because my kids don't like hot dogs. But they eat these, especially at birthdays.
As I mentioned in a previous post, Argentina is well-known for its empanadas and the dough is readily sold in pre-packed disks. Place these disks on your work surface and either use as is or add an ingredient to each, like mustard, cheddar cheese or ketchup. Place a vienna sausage in the middle, roll up and then cut into three pieces. These freeze very well.
Follow me on Instagram: johncavernelis
Check out my Facebook page: Simple Foodies