Friday 30 January 2015

Buffalo wings

When I was a kid, chicken wings were sought after at our house and, having an older sister who was more agile at grabbing them from the platter that my mum placed on the table, I always thought it unfair that chickens should only have two wings. So, fast forward several years and my own son shares my love for chicken wings. But now I live in Argentina, where people don't have the same fascination for chicken wings and they are readily sold on their own. Heaven!!! I can now but the chicken wing count of ten chickens and not break a sweat. A win-win situation!!! So let's get about preparing these delights:
To start with, a bit of chicken anatomy: the wing is made up of three parts and the tip or thinnest of the three parts, I usually cut off and discard. Then I separate the other two parts one from the other. Salt the wings lightly, place in a microwave dish and cook for about 10 minutes. After about five minutes, stir the wings so that they cook evenly. Note: due to the amount, it is unlikely that all the wings will be cooked completely. No problem as you'll be baking them in the oven later.
Step two is to marinade the wings and the tendency for good chicken wings is to go sweet, with a bit of sour and some spiciness. Keeping that in mind, I made my marinade using honey, balsamic vinegar, ketchup, BBQ sauce and a bit of lemon juice. For heat, I added ground chilies. Flavour with some crushed mustard and coriander seeds. Mix all the ingredients in a bowl, add the (now partially or completely cooked) chicken wings, mix through and allow to stand for a few hours at least. Overnight or a day or two is even better.
Take your flat oven baking tray and line it with aluminium paper and place your wings on there and bake in the oven for as long as it takes for the sauce to dry out and for the wings to become crispy. You will have to turn it over once or twice. And there you have lovely chicken or buffalo wings.
Check out my Facebook page: Simple Foodies.

Thursday 29 January 2015

Cauliflower with white sauce

The source (no pun intended) for this post came from my nephew, Simon, who, earlier this week, made cauliflower with white sauce. His favourite. Only to accidentally drop the dish while removing it from the oven. So, in his honour, I'd like to present a variation on the typical cauliflower white sauce. This is the more "foodie" version.
First of all, steam your cauliflower by placing it in a metal rice strainer (a sieve will do) which is then placed inside a pot that has about 2-3cm of water in it. Steam until a sharp pointed knife can seamlessly pass through the cauliflower. Allow to drain and cool completely.
Next, cut or break the cauliflower apart, into florets. Place the individual florets in a bowl, stems up and "reassemble" the cauliflower, up the sides of the bowl (you will probably only get halfway before the sides start tumbling down).
Now place a second, smaller bowl on top of the cauliflower base and press down hard, thereby compacting the cauliflower between the two bowls. Maintaining this pressure, start to press more florets in between the two bowls, always pushing downwards, until no more can enter. Place something heavy inside the second bowl and leave in the fridge for a while.
When you remove it from the fridge, take out the weight and the small bowl and you will now have a cauliflower-shaped hollow bowl, into which you can add the rest of the cauliflower bits and the sauce.
To make the sauce, you will need about 300-400ml of milk, a piece of butter and some cayenne pepper (of pimenton dulce as I used). Heat these in a pot. Meanwhile, in a mug, pour about 100ml of milk and add 2-3 heaped teaspoons of corn flower (Maizena) and stir until dissolved. Add to heating milk and with a spoon or whisk, stir until it thickens. Remove from heat and add grated cheese and mix. Allow this to cool before pouring into your cauliflower bowl (to the very top) and return to the fridge.
Once set, place a flat, oven-proof dish on top of the cauliflower and turn over, so that you now have a perfectly formed cauliflower dome standing in your dish, with the sauce on the INSIDE. sprinkle with cheese and pour any excess sauce around the base of the cauliflower dome and bake in the oven until the cheese melts.
As you dish into the dome, the cheesy sauce will ooze out. YUM!!!!
Follow me on Instagram: johncavernelis
Check out my Facebook page: Simple Foodies

Wednesday 28 January 2015

Empanadas

You might recall from January 20th post on milanesas, that it was the Argentine favourite food. If that is true, the empanada comes in a close second.
An empanada is basically a pie: a piece of pastry with a filling. These fillings differ from minced meat, to knife-cut meat chunks, to ham and cheese and to a host of other interesting ingredients and combinations. In Argentina, empanadas are also quite regional so that those eaten in the Province of Salta are spicier and will differ from the sweeter Cordoba ones, while those from Patagonia will use lamb as opposed to beef used in the majority of other empanadas.
In Argentina, the empanada dough disks are sold ready-made. They are circular, with a diameter of 12cm. If you need to make your own dough, follow this recipe:
Sift two and a quarter cups of flour and one and a half teaspoons of salt into a bowl. Add about half a cup of butter and rub into flour until you achieve a crumbly mix. In a separate bowl, beat one large egg, a third of a cup of ice water and a tablespoon of vinegar. Slowly add the liquid mixture to the dry ingredients until just incorporated (it will appear quite shaggy). Turn out onto your work surface and knead a few times until the dough comes together. Form into a thick rectangle, wrap in plastic wrap and cool for an hour in the fridge. Once cooled, roll out and cut your circles (with a dessert bowl?). You should achieve about 12 disks.
Or you could just live in Argentina and buy the disks ready-to-use!!
Now for the classic Porteño (Buenos Aires) filling (and a more South African version too):
For 500g of lean minced meat, use one large onion, cut up into small cubes. Fry this in a pan with butter, adding salt and pepper to taste. Once transparent, add the minced meat and while it is cooking, break apart with your stirring utensil. The meat will give off liquid so don't add any. Once thoroughly cooked, add two hard-boiled eggs that are cut up finely as well as olives without the pips, that have been thoroughly diced. To finish the mixture (and to help it bind), add a healthy squirt of ketchup.
The South African version is the same as the above, just that at the onion stage there is garlic, chili, ground coriander and a teaspoon of masala paste added to the mixture. Also, no olives!
Allow the filling to cool thoroughly. And now the fun starts: folding the empanadas. This is tricky but a YouTube search for "how to fold empanadas" or "repulge" will deliver a host of cool and pretty instructive videos. All it takes is a bit of practice. Empanadas are often identified by their fold, and the traditional fold for meat empanadas is the common one seen in the videos.

To all my Argentine friends and family, please forgive me but I couldn't resist buying an empanada folding thingy that works like a charm!!!!! Technology meets tradition!!

Once folded, these are then either baked in the oven on a buttered baking sheet or deep fried in oil. They also store very well and I enjoy making up to three dozen at a time (different kinds) and then freezing them, ready to pull out of the freezer and cook.
Follow me on Instagram: johncavernelis
Check out my Facebook page: Simple Foodies

Tuesday 27 January 2015

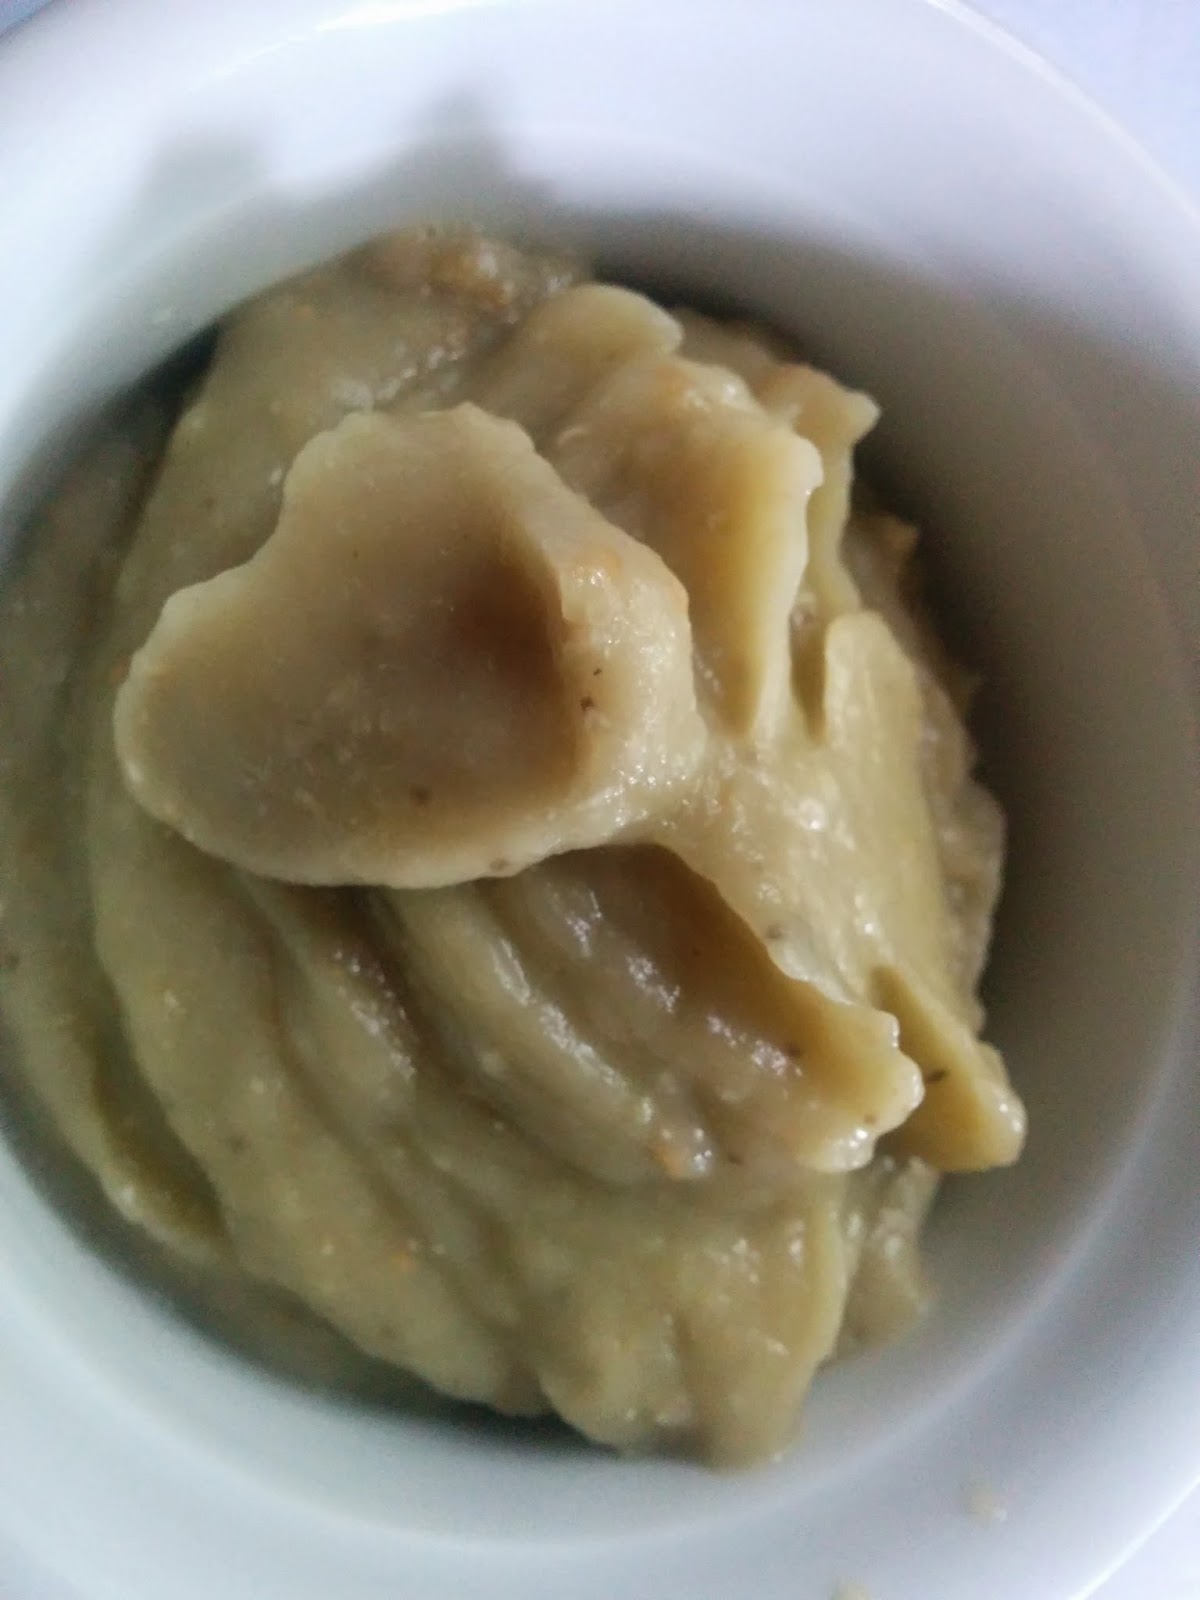
Eggplant paste / Pasta de berenjenas

As I sat down to write this simple recipe, I first decided to look up the name of this strange vegetable since it goes by so many names around the world. Turns out, the eggplant is also called aubergine, melongene, garden egg, guinea squash and brinjal. Not to mention a colloquial name on the Cape Flats in Cape Town, South Africa, which I would rather not mention here. It's quite fitting that this vegetable has such a wide variety of names, as it is so very versatile. For today's recipe, we will be making eggplant paste.
To start with, you will need to cook the eggplants and here I've taken the easy way out and used my microwave. Take the eggplants (in my case three), punch a few holes in the veggies with a fork, place in a microwaveable dish with about two centimeters of water and cook for anything between 10 to 15 minutes.
Once soft, allow to cool. Cut open and scrape out the flesh and leave the skin. Place the contents on a container and add 1-2 cloves of crushed garlic, salt and course black pepper to taste and blend, using a hand-held blender. Add a little olive oil to help obtain a smooth paste.
Serve cold or at room temperature with bread. Works very well as part of a picada or tapas.
Follow me on Facebook: Simple Foodies

Monday 26 January 2015

Recycling

Whenever I open my fridge I finds small bowls or Tupperware containers that contain small amounts of food that have been left over from the previous meal. Cooked pasta, rice, mashed potatoes and so on. Never enough to actually feed more than about half a person but, apparently, too much to throw away without feeling guilty about wasting precious food. And so I have have started to think creatively about re-using these bits and pieces and converting it into something new. Here are a few examples:
Mashed potatoes: roll into small balls, roll about in bread crumbs, place on a plate or tray and leave in the freezer for about an hour. Remove from the freezer, roll in beaten egg and then roll about in more bread crumbs and freeze for later use. Tip: freeze in such away that the individual balls don't touch one another (use plastic wrap to keep them apart) and in that way they won't break when you need them. To prepare, heat oil in a small pot until very hot and drop the balls in for about 30-40 seconds until lightly toasted.
Rice: season the rice with flavoured salt or food seasoning and add a beaten egg to it and mix thoroughly. Now spoon the desired amounts into muffin tins, flatten and bake in the oven to make exquisite rice cakes. I also like to add sesame seeds to the top by way of flavouring and decoration.
Bread: this is perhaps one of the most versatile foods in your house by way of recycling. The first step in the recycling process is to toast the bread. The rest can be frozen and used later, again, first to toast. Here you could add a drizzle of olive oil and a smattering of herbs or cheese to make flavoured toasts as a starter. Bread can also be cubed and toasted in the over as croutons to be added to salads or soups. And last but by no means least, at any stage in the bread process, it can be put in a food processor and converted into bread crumbs to be used for a variety of uses.
So think about what you have and what it could possibly be used for before throwing it away.
Check out my Facebook page: Simple Foodies

Sunday 25 January 2015

Pesto

So it turns out my garden has produced more basil than I could possibly use in salads and sauces. And to avoid it going bad, I've gone and made a pesto sauce for pasta. The nice thing about pesto is that it freezes really well and can be used at any time. Furthermore, I took some of the fresh basil, washed and dried it and placed the leaves in a Tupperware container - the leaves freeze well too. So, let's make pesto.
You will need a good amount (three to four handfuls) of fresh basil leaves, washed and dried. Place the leaves in a food processor (which will produce a smoother finished product) or, as I do, in a mortar and pestle (which will produce a more rustic product).  Add some course salt for its abrasive texture, a clove of garlic and a handful of lightly toasted pine nuts (which you can also substitute for almonds). Now pound away. The volume of the leaves will decrease as you pound them, allowing you to add more to your mortar and pestle.
When your leaves are thoroughly bruised and the nuts all but crushed, remove from the mortar and pestle and place in a small bowl. Add in some grated Parmesan cheese and stir. Now start adding olive oil until the point that everything comes together and your pesto is done.
Follow me on Instagram: johncavernelis
Check out my Facebook page: Simple Foodies

Saturday 24 January 2015

Peach chutney

When I started this page I made myself a promise to try and keep the recipes simple (hence Simple Foodies) but with the idea of the final product appearing more complicated. Today's recipe achieves that goal splendidly!
To make about 1,5 litres of chutney, I used 2kg peaches, peeled and sliced, 4 large onions that have been peeled and sliced, 300g to 350g of white sugar, 4 cloves of garlic, crushed, 200ml vinegar. For the spices, I used 25ml curry spice, 10ml tumeric, 5ml cayenne pepper and 10ml of salt.
Add all the ingredients into a thick-based pot and bring to the boil, stirring frequently. Reduce the heat and allow to boil for up to an hour. When the fruit is soft and falling apart, your chutney is done. If it is too runny, however, mix three teaspoons of corn flour (Maizena) in half a cup of water and stir into the mix, give it a quick boil and allow to stand.
Bottle in sterilized jars and allow to cool. Store in a cool dark place.
Follow my Facebook page: Simple Foodies

Friday 23 January 2015

Eggs (cont)

After yesterday's post I was reminded of a recipe I used to cook my dad when I was only a boy. It was my stock, quick recipe for lunchtime during the school holidays (when cooking for my dad and I became my responsibility). I must have fed him more French toast than any human should endure. Thanks Dad for never complaining and for allowing me to experiment from such an early age.
So for French toast, you will need eggs, herbs of choice (dried or fresh), salt and pepper and then experiment with chilies for a bit of heat.
Beat the eggs in a bowl, add whatever spices you like (oregano, parsley, marjoram were always my favourites) as well as salt and coarsely ground black pepper. Now take your bread (if it is slightly stale, all the better, as it won't fall apart when moist with the egg) and dip it into the egg mixture, turn over and do the other side. Then place that soggy bead into a pan and fry lightly on both sides. And voila, you have French toast.
At this stage, I have been coerced by my nephew's girlfriend, Tina, to include her stock egg recipe, called "egg in a hole" and which she claims was invented by her granny (mmmm????). Anyway, as the name suggest, take a piece of bread and cut a hole in the center (I used a cookie cutter) and place it in a pan and crack an egg in the middle. Add whatever condiments you desire. You may also decide to flip the toast over. And voila, egg in a hole. Thanks Tina and Tina's granny.
Follow me on Instagram: johncavernelis
Check out my Facebook page: Simple Foodies

Thursday 22 January 2015

Eggs and omelettes

Eggs find their way into so many of the things we cook daily but for today's post, I'd like to concentrate on their use in the making of an omelette.
By definition, an omelette is dish made from beaten eggs that are cooked rapidly with butter or oil in a frying pan. Now let's be real: that sounds boring. Omelettes are much more due to the extra thing
s we add into them.
In a bowl, crack three eggs and beat lightly. Add in salt and black pepper to taste. Also add half a teaspoon of baking powder (to make it light and fluffy) as well as a quarter teaspoon of ground cumin or ground chili for heat and flavour. Next add in any or all of the following, all of which are chopped finely: parsley, onions, peppers.
In a pan, add a knob of butter and when the butter melts, pour in the egg mixture and allow to cook for a few seconds. Then, using a spatula, start pulling the egg away from the edges toward the middle, repeating this process until all the liquid part of the mixture is  gone. Your omelette is now one step away from being cooked and here comes your moment of choice: you can finish your omelette off like a chef or not. The first is slightly more complicated and takes practice. The second method is a "cheat" but works for us "non chefs".
Chef method: holding the pan at the handle with one hand and tilting it slightly, gently beat the edge of the handle with your other hand and the omelette will slide up the side of the pan and eventually flip over onto itself. Then repeat this process for the other part and you'll have a perfectly formed omelette.
Cheat method: (this works if the omelette is too thick for the above method to work effectively) Take a plate that fits inside you pan and place it over the omelette. Put one hand on the plate while the other holds the pan. Now rotate both your hands at the same time and in the same direction so that the omelette ends up in the plate. Then simply slide it back into the pan and it'll cook on the other side. Then your omelette will fold easier.
Check out my Facebook page: Simple Foodies

Wednesday 21 January 2015

Pasta salad

Salad and summer go together like hand in glove. And this particular salad is so versatile that it can be used as a side dish at a barbecue / braai / asado or as a meal all by itself. It is a real crowd-pleaser as the combination of flavours are awesome.
I like to use bow tie pasta as the curves allow for the sauce to be caught up, thereby ensuring that each mouthful is an explosion of flavour.
Boil the pasta until done and rinse in cold water immediately to stop the pasta from over cooking.
Meanwhile, prepare the following: peppers (whatever colours you can lay your hands on), onions and fresh cilantro / coriander, all finely diced.
In a mug, add a generous amount of mayonnaise, a teaspoon of sugar, freshly ground black pepper and milk to dilute the mayonnaise to a slightly runny consistency.
Now simply combine everything and allow to cool down in the fridge before serving.
Follow me on Instagram: johncavernelis
Check out my Facebook page: Simple Foodies

Tuesday 20 January 2015

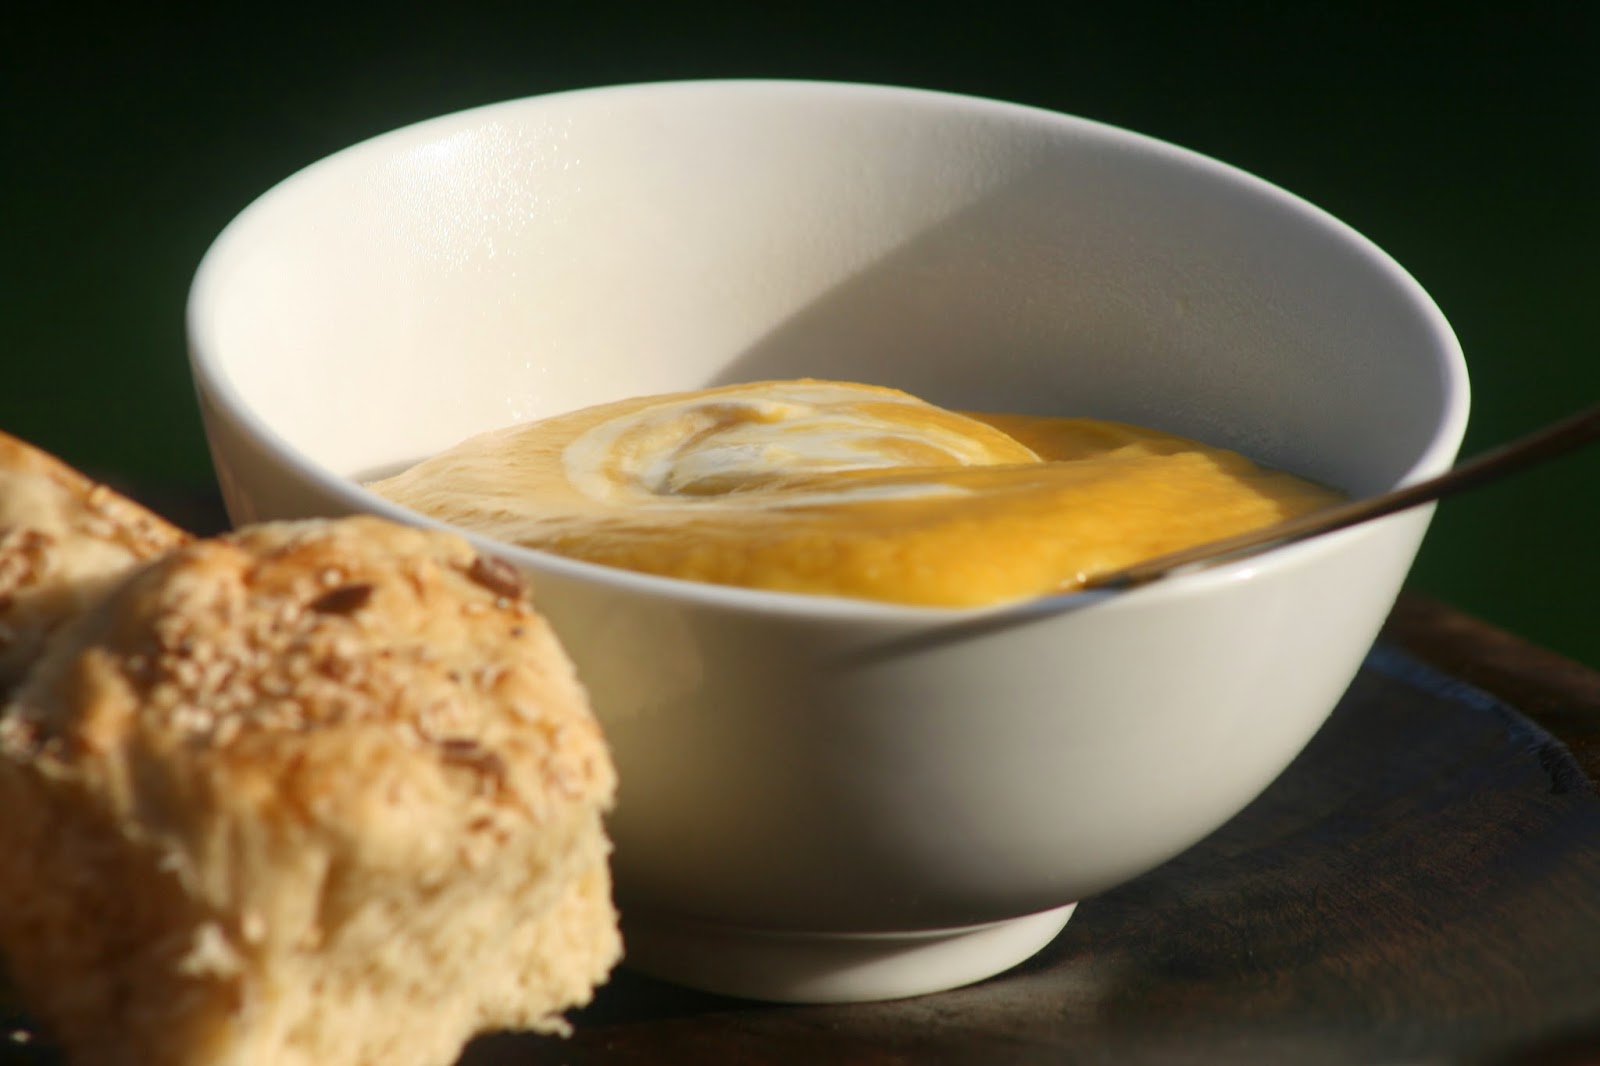
Pumpkin / butternut soup

This is a truly versatile recipe that is easy to make, it never fails and can be tweaked to become something different every time. It's rick and thick and warming, just what a soup should be. Oh yes, and very tasty too.
Take one large onion and dice it up as you like (as we'll blend the final product anyway). Add the onion to a pot with a clove of garlic, cut. Add a good knob of butter and cook the onions and garlic for about three to four minutes. Now add three big potatoes that have been peeled and cut up as well as half a butternut or a few pieces of peeled pumpkin. To this mixture, add a vegetable stock cube that has been diluted in a cup of boiling water. Add more water to cover the veggies. Boil until everything is soft. By way of flavour, add tarragon or rosemary or, as I did today, half a teaspoon of dried cumin. Once everything is soft, blend until you have a thick, homogeneous soup. Return to the pot and boil for another two minutes, adding milk to achieve the consistency desired (or water if you don't want a thick creamy soup.
Serve with dollop of cream accompanied by fresh bread!
Follow me on Instagram: johncavernelis
Check out my Facebook page: Simple Foodies